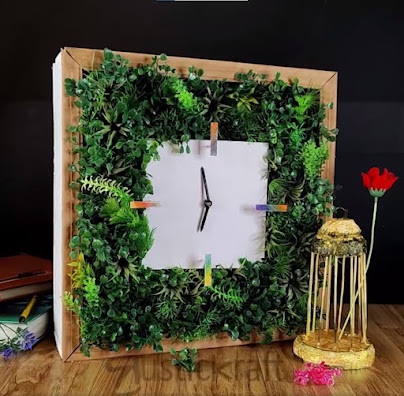
Building An Amazing Wall Clock made with Plywood
Video name: Plywood Clock Creation
Material used:
- Plywood
- Cutting Tools
- Spray Paint
- Artificial Plants or Decorative Elements
- Clock Mechanism
Procedure:
Step 1: Prepare the Plywood
- Measure and cut the plywood into a square shape. This will be the base for the clock.
Step 2: Create Dimension
- Make a smaller square structure or frame.
- Attach this structure within the larger plywood base. This adds depth and dimension to the clock.
Step 3: Incorporate a Decorative Element
- Craft a structure using synthetic mesh or any decorative material to fit within the wooden structure.
Step 4: Apply Surface Finish
- Prepare the plywood surface by sanding and finishing it for a smoother look.
- Use spray paint or any desired coloring method to add a touch of color to the wood. Let it dry completely.
Step 5: Install the Clock Mechanism
- Securely attach the clock mechanism in the center of the small plywood structure. Add simple, sleek clock hands for an understated yet elegant design.
Step 6: Add Greenery for Aesthetic Appeal
- Place artificial plants . These decorative elements offer a natural and visually appealing touch to the clock.
This comprehensive breakdown will provide a more detailed and clear understanding of the process, allowing viewers to follow the steps easily while creating their plywood clock.


Post a Comment